A Two-Dollar Microcontroller That Still Teaches Real Lessons
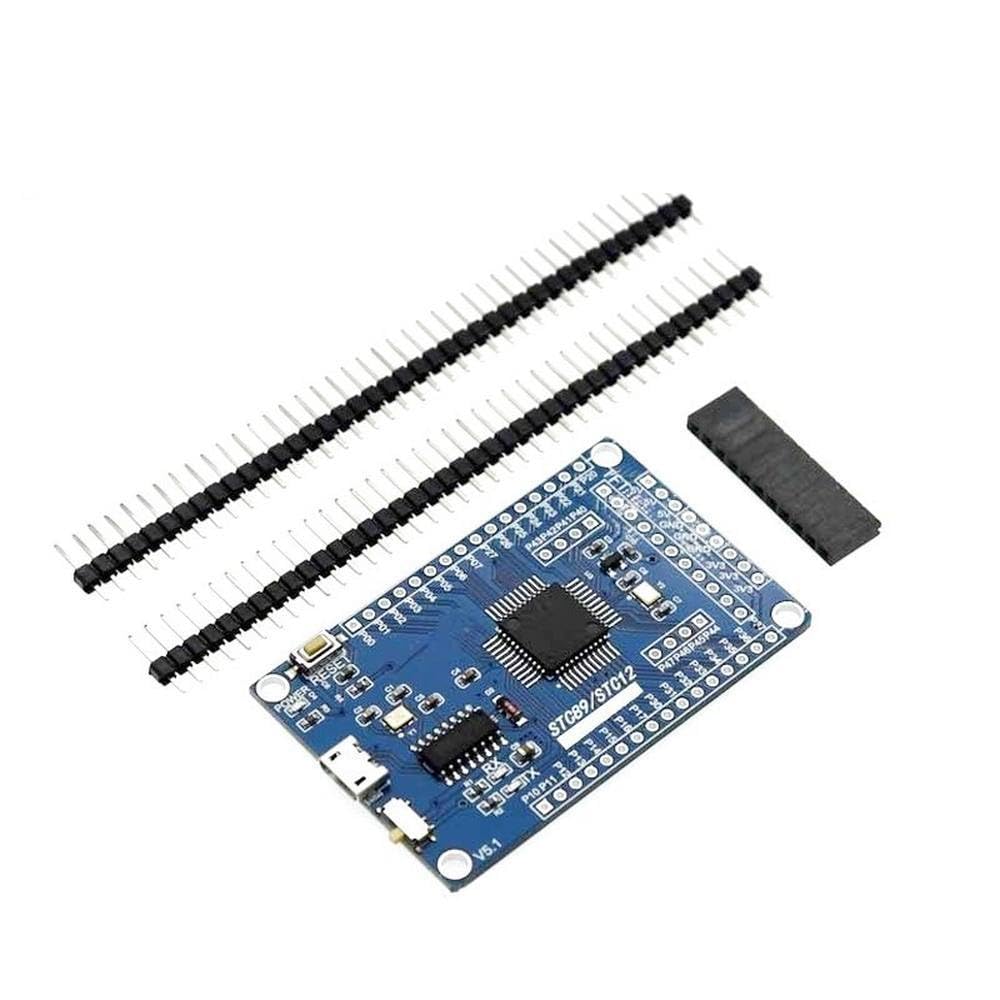
The STC89C52RC is about as unglamorous as microcontrollers get: an 8051 core dating back to 1980, running at single-digit MIPS, with no USB peripheral of its own and a datasheet that reads like it hasn't been touched since the Clinton administration. And yet a board like the one above still ships from Amazon or AliExpress for a few dollars, drops onto a breadboard, and teaches the same fundamentals — registers, ports, interrupts, a UART you actually have to configure by hand — that get abstracted away by every modern dev board with a friendly Arduino wrapper around it. There is something clarifying about a chip with no hidden layers left.
This page is the practical companion to that experience: how to go from a blank .c file to blinking LEDs on real STC89C52RC silicon, using a free compiler (SDCC) and a free editor (Geany), entirely on Windows, without a single proprietary IDE in the chain.
What Makes the STC Family Different
Most 8051 tutorials on the internet assume an AT89S-series chip with a dedicated SPI/ISP programming header — plug in a USBasp, run avrdude, done. The STC89C52RC quietly breaks that assumption. STC Microelectronics built their own bootloader directly into the silicon, one that talks over plain UART rather than SPI. There is no ISP header to find on the board, because there doesn't need to be one — the same micro-USB port used for power doubles as the programming connection, via an onboard USB-to-serial chip.
The tradeoff is a small ritual: STC's bootloader only listens for a moment right after power-up. Programming isn't "click flash and walk away" — it's "start the tool, then physically power-cycle the board when it asks." Once the chip responds, you'll see a distinctive handshake byte on the wire (70H), and the rest of the transfer happens automatically. It feels old-fashioned. It also basically never goes wrong once you know to expect it.
The Toolchain
Three pieces, all free, all doing one job well:
- SDCC (Small Device C Compiler) — an open-source C compiler purpose-built for 8-bit targets like the 8051 family. It compiles and links in a single pass, producing an Intel HEX file ready to flash.
- Geany — a lightweight text editor with a configurable Build menu. With the right commands wired into its Compile/Build/Execute buttons, it becomes a genuine one-click IDE for embedded work, no heavyweight toolchain required.
- STC's own ISP utility — the piece that actually talks to the bootloader over UART and pushes the compiled hex into flash.
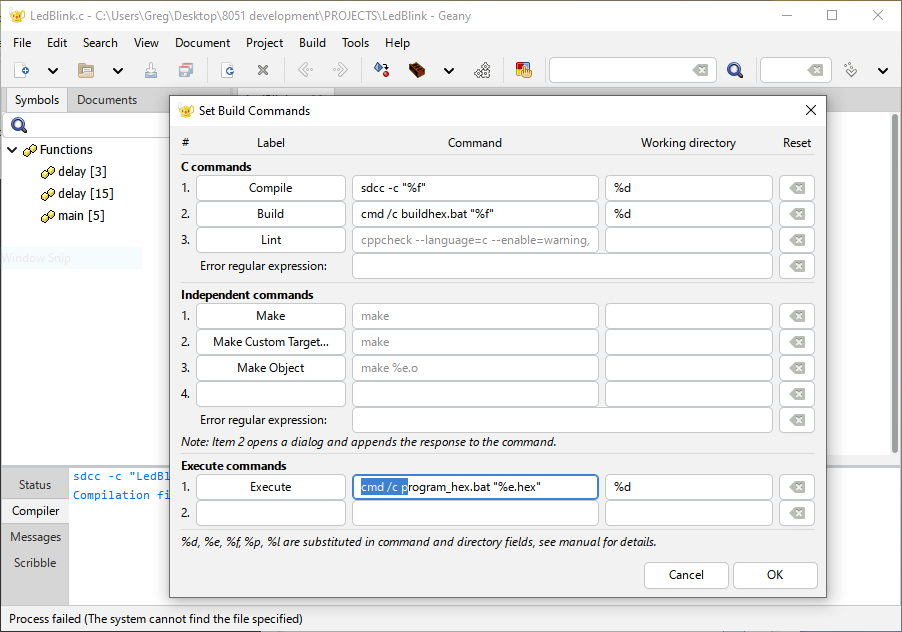
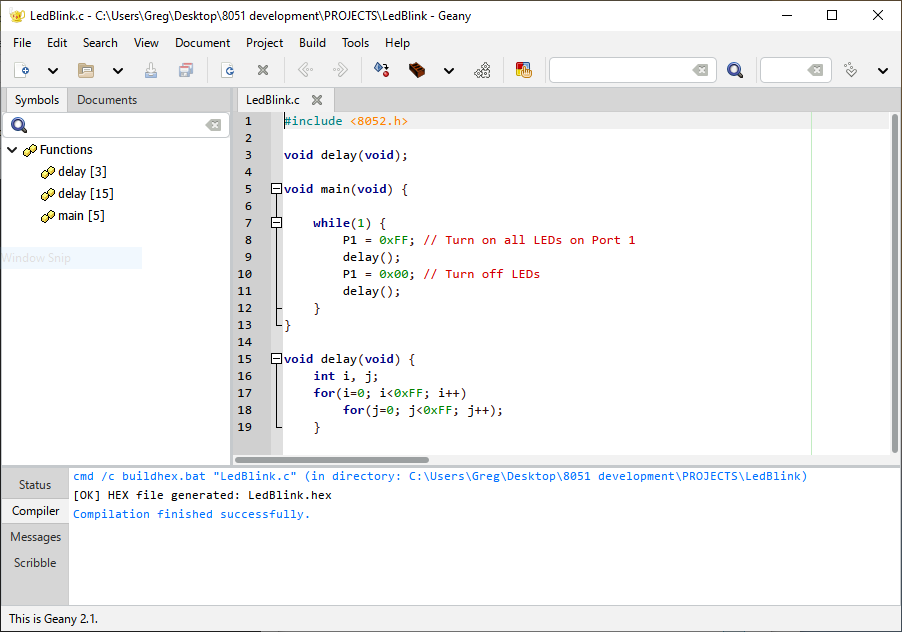
The one wrinkle worth knowing in advance: Geany launches build commands directly, without a command shell in front of them. That's fine for calling sdcc.exe straight, but it trips up anyone routing through a .bat wrapper script — the fix is as simple as prefixing the command with cmd /c, and then Geany's Compiler panel shows the same clean [OK] result you'd get typing the same command at a prompt.
The Workflow, Start to Finish
+----------------------+
| Write LedBlink.c     |
| (registers via       |
|  8052.h)             |
+----------------------+
           |
           v
+----------------------+
| Compile with sdcc    |
| -> .ihx + .map        |
+----------------------+
           |
           v
+----------------------+
| Rename/convert to    |
| standard .hex        |
+----------------------+
           |
           v
+----------------------+
| Run STC ISP tool,    |
| power-cycle board    |
| on prompt             |
+----------------------+
           |
           v
+----------------------+
| Bootloader responds  |
| (TX: 70H), flash     |
| completes             |
+----------------------+
That whole loop — edit, compile, flash, watch the LEDs blink — comfortably fits inside a minute once the tooling is set up correctly, whether you're driving it from a raw command prompt or from Geany's F9/Execute buttons.
Get the Full Write-Up
The complete beginner's guide covers the SDCC install (including a PATH conflict that trips up anyone with MinGW/GCC already installed), the full buildhex.bat and program_hex.bat scripts, exact Geany Build Command settings, and a troubleshooting section built from the actual errors this workflow produces the first time through.
Where This Goes Next
A blinking LED is the "hello world" of embedded work — necessary, but not the point. The same toolchain scales up cleanly to timers, UART communication with a host PC, interrupt-driven I/O, and eventually small standalone instruments built around a chip that costs less than the header pins it ships with. That's the real appeal of a board like this: not what it does out of the box, but how little stands between you and the hardware once the toolchain is out of the way.